Desk & Storage...Yes, PLEASE!
- AureliaVining
- Aug 21, 2022
- 7 min read

Have you ever committed to something and halfway through it realized you are on the long road to completion? My desk build had me questioning my choices several times...LOL, which is exactly why I decided to write about my experience, and give you my suggestion for a speedy completion.
Covid had, and still has people working from home, because of it ,we've seen home office designs become super important - moving to the top of many to-do lists - making the desk, a very sought after and important piece of furniture. Now, I went through two desks myself, before I decided to just build the desk I was looking for. Nothing was working like I needed it to and I desperately needed a large worktop.
I had four drawers from a dresser that I had turned into a TV stand, and thought...yeah...I'll repurpose those. Easy, right? Well, making the box and having the drawer fronts flush with the face, turned out to be a bit more challenging with the draw fronts on (they were heavily glued on). My suggestion is find a dresser that you can add the desktop and legs to, and save yourself the time and headache. So, what I'm doing for this project walk-through is starting at the point I had my dresser chest built - save us all the headache.
I wanted my desk to be a total of 60" long x 40" wide x 40" tall - the first step of drafting a plan for construction. All the dimensions in this walkthrough are to make a desk with these measurements. Adjust yours accordingly, if needed.
Things you'll need to make this desk...
Materials:
Wood filler
Sandpaper 120- 220
Primer
Stain of choice
Paint color of choice (Enamel Cabinet paint works best for the tabletop
Furniture feet
Wood glue
1" Pocket screws
1" Wood screws
Paint brushes/ 4" rollers
Drop cloth
Tools:
Table or circle saw
Orbiter sander
Miter saw
Router w/router bits
Drill w/bits
Screwdriver
Boring bit - 1/2"
Pocket hole jig
level
Wood:
A dresser - my dresser chest measurements are 27 5/8" W x 17 1/4" D x 34 1/2" T
1 - 3/4" choice wood. I used a veneered Plywood 4' x 8' sheet
2 - 1" x 4" Pine wood board
4- 1" x 2" Pine wood board
As always make sure you're staying safe and wear the appropriate protective gear while working: eye protection, face mask, and gloves.
Now that you have everything, lets get started...
Step One: Prime, Paint/Stain dresser
I stained the sides of my chest and painted the front. You don't have to worry about getting the top because we're going to cover it with our 40" x 60" tabletop. This step will vary for you, depending if your upscaling a dresser, or bought an unfinished one. If yours is a repurposed dresser then, strip, sand, prime, and paint it accordingly.
Using desired paint color/stain, or both, paint your dresser chest. Remove drawers and paint separately. Let drawers and chest dry completely before reassembling.
Step Two: Attach feet
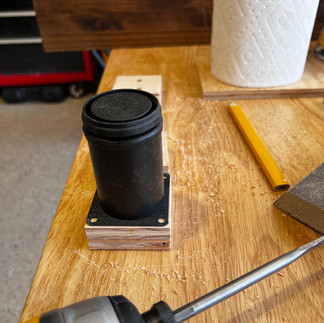
You can see that I did this step before painting and I ended up having to tap off the blocks I added (for height), not a huge pain, but avoidable with some patience, LOL. And since you probably have more than me if you're still reading, it's just easier to do this step now. I bought these 3" Furniture legs off Amazon that were adjustable so I had the ability to adjust if my floor didn't end up being perfectly level, or, let's face it, if my measurements weren't perfect. Having wiggle room to make the desk as level as possible makes for easy fixes.
I had to add 3/4" blocks for height, and I like how it made the legs look more finished. I attach pre-measured wood block that were the same size as the leg attachment plate, countersunk those screws so they didn't cause issues with the foot attachment plate. Screw in the adjustable legs with provided screws.
Step Three: Cut the top, trim, and legs, then sand all pieces
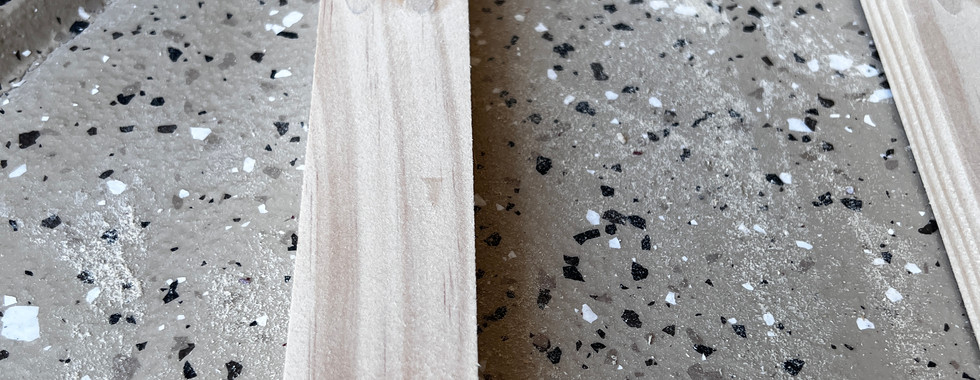
I ripped my 4' x 8' piece of veneered plywood down to 40" x 60" - that's the desktop. Using the 1" x 4" pieces, I cut (4) 3' - 3 3/4", and (2) 9 1/2" pieces - these are the table legs. I cut the 1' x 2" pieces into (2) 60", (1) 40", (4) 18 1/2" - these will be the tabletop trim and the leg top and bottom support pieces.
Cut the table top with table saw or circle saw. Cut the 1" x 2" and 1" x 4" with the miter saw.
Step Four: Attach trim to table top
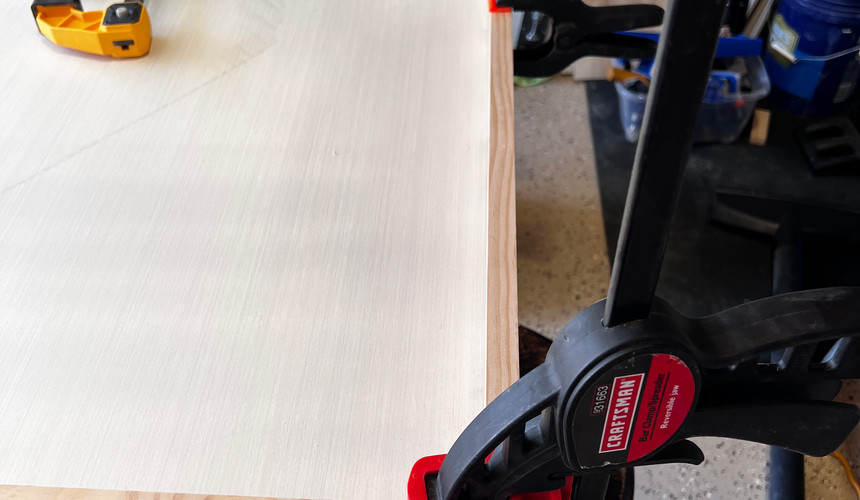
I chose to do 45 degree corner cuts, and when I do them, I always cut the angle by marking it. meaning...I braced the side trim pieces to the bottom of the tabletop, marked the end and took it to the miter saw to be trimmed (if needed) and made the 45 degree cut on the ends. I glued both side pieces down, clamping till dry. Then I placed the end pieces down, marked where their 45 cut would be, cut, and then glued and clamped them in place, to complete the trim under the table top.
For the end where the dresser is, center the dresser to the middle of the top, mark and cut to fit. as seen in the last three images below.
Step Five: Fill holes with wood filler, sand and touch up primer.
Just like caulking works when placing floor and ceiling trim, wood filler made the table trim and table top look like one piece - I love it! I placed wood filler around the whole table where the trim met the tabletop, waited for it to dry, and then sanded smooth with 220 grit sandpaper.
Step Six (Optional): Route table edge.
This is an optional step, but I totally recommend it. I love how finished it looks and if you have small children, rounding any sharp edge is always a good idea. I don't have small kids, but I love detailed edges, so I made this step a MUST. To get the best result I made several passes till I had a smooth cut all around, adjusting my plunge depth as needed.
Using a 5/8" chamfer bit (or desired profile), make several passes around the top of table till smooth.
Step Seven: Prime & Paint all pieces
Zinsser primers are my go-to choice, mainly because they dry fast and I've never had an issue with coverage. That's what I used here and it worked great. I do two coats of primer on bare wood, sanding in between coats with 220 grit sandpaper till smooth. Both sides, and edges of all pieces need to be done. Paint with desired color when dry. I used enamel paint for the table top and a flat black spray paint for the legs.
Step Eight: Make Legs
When the paint is dry, make the legs for the desk. Flip the table top over, align it with your dresser chest, and use something that's adjustable to prop-up the end of the table, adjusting height till the tabletop is level. I have an adjustable worktop, which often comes in handy for things such as this.
I used this drawing to help find my angles and dimensions of my legs.

Mock-up of desk dimensions.
To actually cut the leg pieces I just placed one of the 9 1/2" pieces of 1"x 4" on the ground, centered (CL), as shown in the diagram below. Then I took one of the 3' 3 3/4" pieces of 1" x 4", held it against the side of the table, marked where it hit the trim line on the tabletop (where the 1" x 2" meets 3/4 top piece), and where it hit the top of the 9 1/2" bottom piece I placed on the ground. Clamp the top to the table for assistance, if you have a second pair of hands available, then this might be the time to call for help. You also need to mark where the vertical legs hit the 9 1/2" piece and cut that angle, as shown. Cut all the marked angles as shown on the diagram using a miter saw.

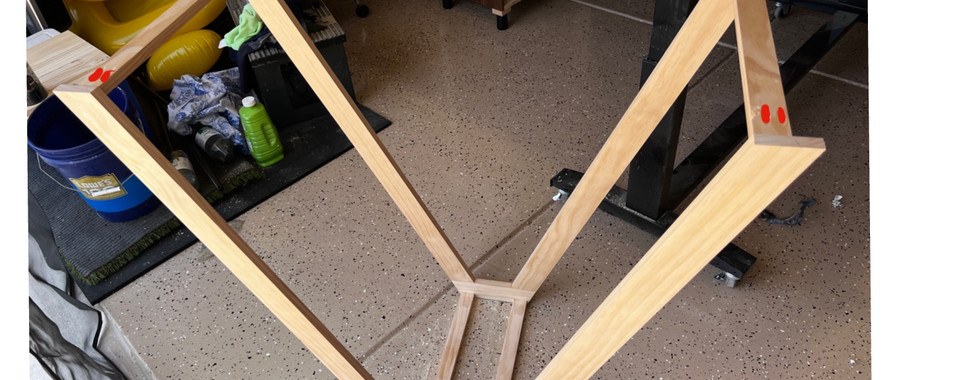
The next step is attaching the bottom piece to the angled sides you just cut. To do this, I used pocket holes (as shown) and put wood glue where the wood connects to the bottom floor piece. I didn't measure where my pocket holes went - just make sure the screw won't pierce through the side of the leg, mark both sides, and drill your pocket holes using your jig.
TIP: Really let the wood glue dry before handling. If you have pocket hole wood plugs use those to fill in the holes made by your jig, sand till smooth.
Now, here's the part where I had to get my husband to help hold the legs up. I'm sure you can figure it out, but this was the finish line for me, and I called in reinforcements. Drill pocket holes into each end of all the 18 1/2", 1"x2" pieces. Attach as shown below. Again if you have wood plugs, it makes the legs look finished in the end - highly recommend.
Drill two pocket holes on both ends of the attachment pieces, and attach the angled legs together as seen here.
Place your legs under the tabletop to check height and make sure everything aligns and looks good. Recheck to make sure your table top is level.

As you can see I waited to prime and paint till the end. It would have been easier if I would have done it in the step above. I ended up using a spray primer and spray paint (Flat Black) for the legs.
I moved my desk inside before attaching the legs and the top to the dresser. Otherwise it wouldn't fit through the door.
Step Nine: Attach legs & Top to Dresser
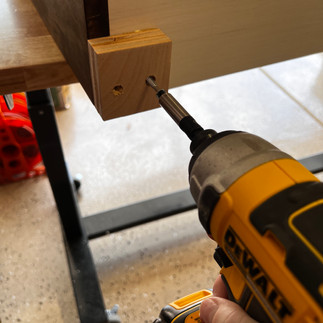
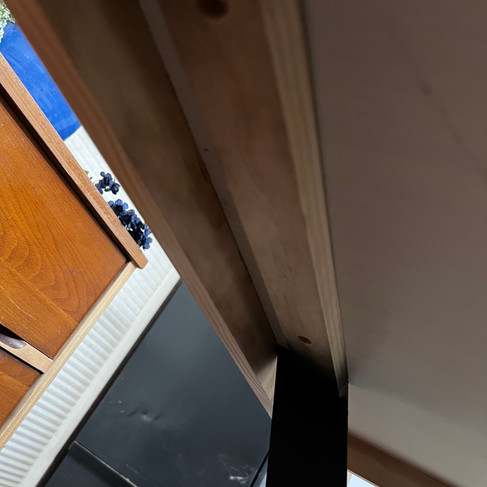
To attach the legs I centered them with the width of the table, and used 1" wood screws to attach the legs to the tabletop. Before putting in the screws, I used a 1/2" boring bit to drill about 1/8" into the leg support that's flush against the bottom of the table. This allowed the screw to grab more of the tabletop. Do this on each side on both supports.
Attach legs to the bottom side of the table using 1" screws and 1/2" boring bit.
Next, I made sure my tabletop was centered and flush with dresser front and gap I made in the tabletop trim. I decided I didn't want to glue the tabletop to the dresser top, so I could move it at a later date if needed. To adjust, I cut two scrap pieces of 1x2's the depth of the dresser and placed along the sides of dresser, and secured them to the bottom of the tabletop. This keeps it from moving side to side.

1" x 2" piece attached to the bottom side of the tabletop, flush with the side of the dresser for stability.
Step Eleven: Style & Enjoy
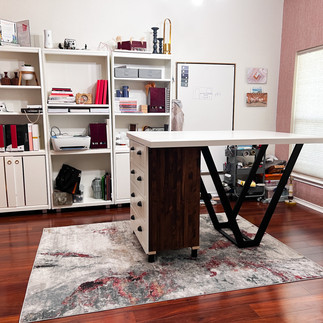
I love the storage! I love the height (I can stand and work), and the work surface is big enough to have my laptop out, material samples all over it and still have room!
Like what you see and decide to make your own - tag us at @reddesignedinteriors and #reddesignedtutorials.

Like what you see, but don't have time right now? Pin it and try the project later!
Step Ten: Attach legs to the underside of the table top




















תגובות